|
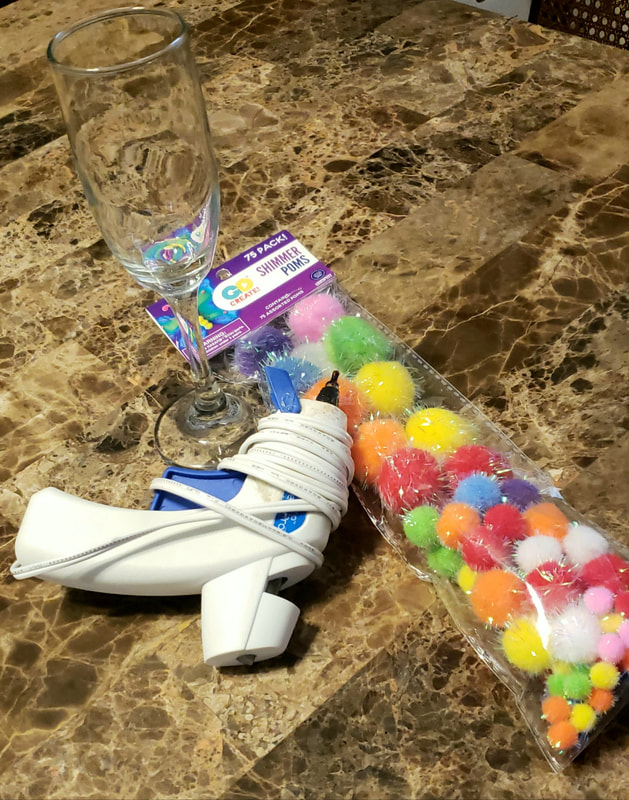
It’s January. January of 2021. This January is undeniably unique. There is still quite a bit of uncertainty as we leave 2020 behind and enter into this new year. Events and gatherings are still slightly unpredictable. Some common ground, that I know we all hold, is the importance of our friends and family. We still want to embrace good times and give meaning to the milestones worth celebrating. This thought has led to A Rogue Ideas January/February theme- small soirées at home. This week we are talking GIRLS NIGHT. It is so important to check in with the women in our lives. It is important to take time to connect with the ladies we hold dear. Why not start the new year with a GIRLS NIGHT in? We just went through the holidays and although they are a wonderful time they can be stressful for some. I’m sure there is plenty to catch up on with the ladies you relate with. With that being said we don’t need to plan an elaborate evening, just enough effort to make it special and stand out. It's always fun to have an interactive element to Girls Night that you can all do together while chatting about the show you just binged on Netflix. This DIY Pom Pom glass tutorial is quick, easy, and gives your girlfriends a favor to take home and use again! 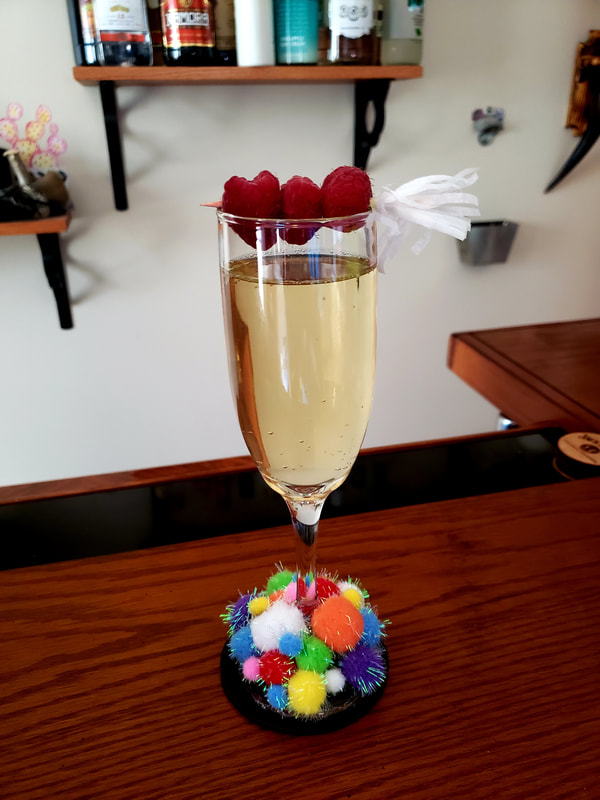 You will just need to grab a few things ahead of time at your local dollar or craft store. Here is what we used:
 First, let's set up your space. If your space allows, set up a station for each of your guests simply by taping down a sheet of parchment paper at each spot. You can even write your girlfriends' names at each spot to make it extra special. Place a glass at each spot and either fill it with an assortment of Pom Poms (they can swap out colors and sizes with each other as everyone starts creating their masterpiece) or you can have a communal bowl in the middle. Place a beverage and snack at each spot so your guests can sip while they work. Finally, add a little flair to each spot by writing a fun phrase or quote or using up that sticker hoard which we know we all have! 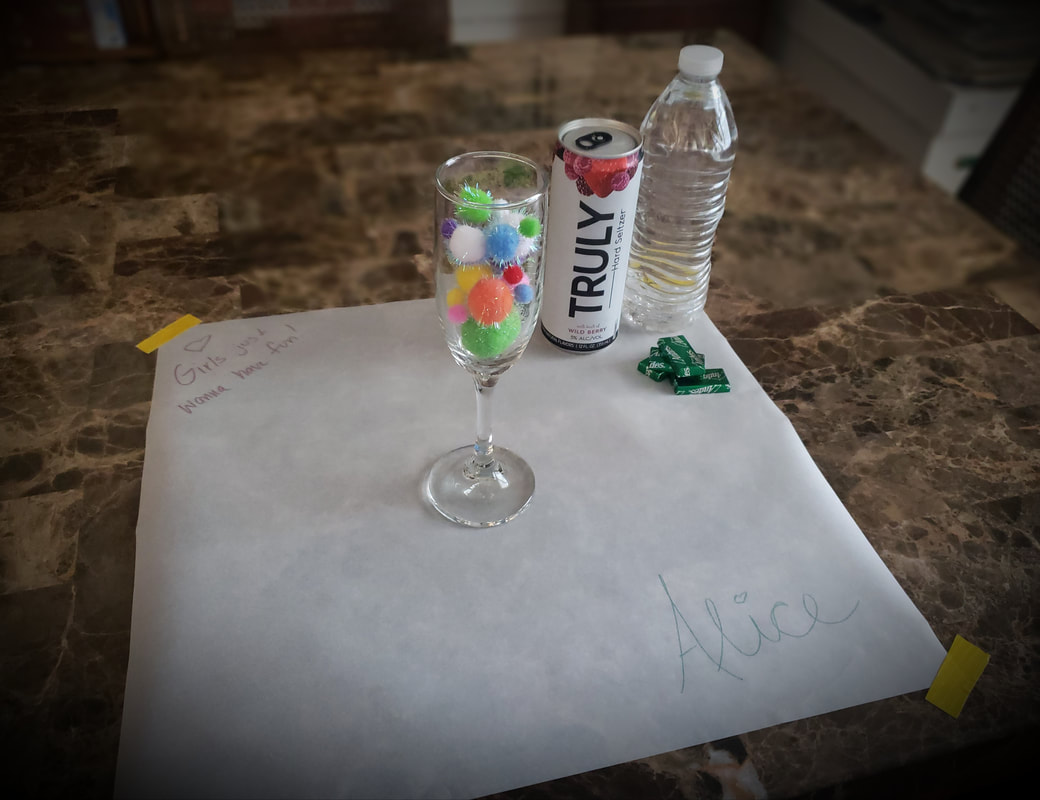 Making the glass is super easy and fun. Using a hot glue gun, glue Pom Poms around the base of the glass mixing up sizes and colors. 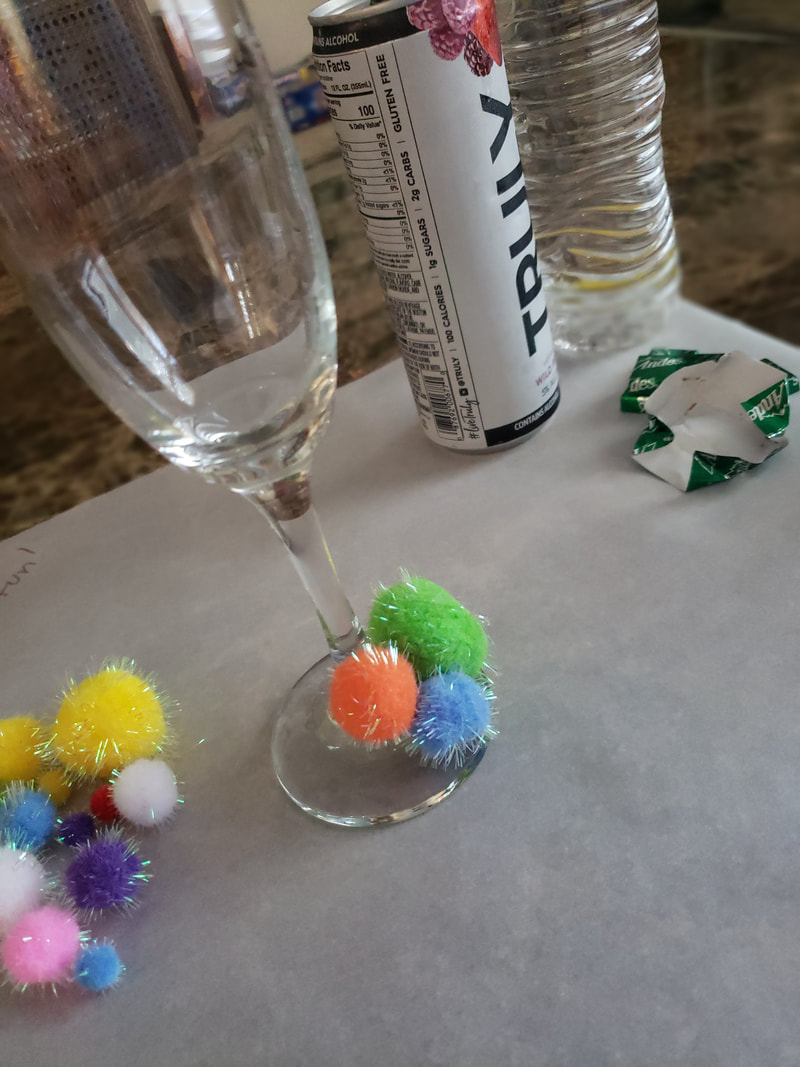 Continue to add Pom Poms until the base in covered. Don't go too far up the stem with the Pom Poms so you still have enough stem to hold the glass. And don't worry if you decide you don't like that one Pom Pom you just placed, you can pull or cut it off and pick a new one! 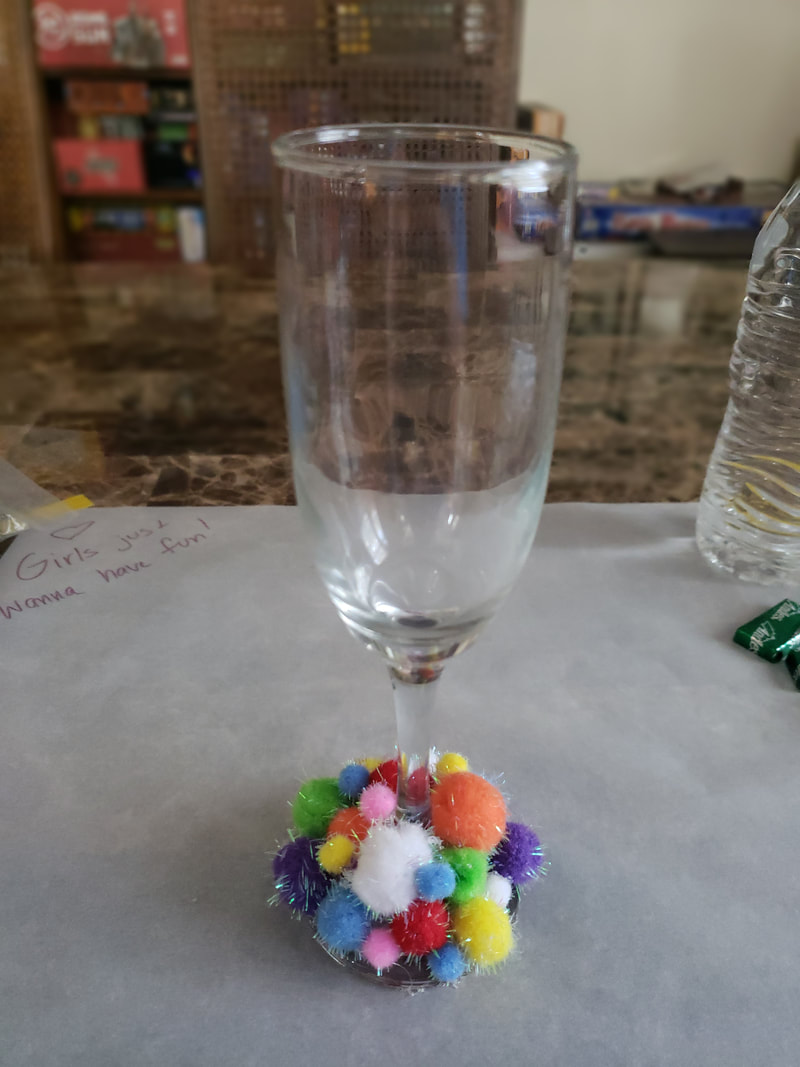 Now it's time to put these new masterpieces to good use. Make a fun cocktail. Let’s channel our inner Carrie Bradshaw and think martinis. What better cocktail for girls night than a cosmo with a twist? Try this raspberry cosmo recipe we have attached below. The drink is fabulous and the perfect way to christen your new girls night glass while watching some old episodes of Sex and the City (or whatever you and your gal pals enjoy) while sipping the perfect cosmo. Let’s take time to slow down, enjoy our lives and love what matters. Raspberry Cosmo Recipe4 or 5 Fresh Raspberries
1/2 oz Simple Syprup 2 oz Vodka Splash of Lemon Juice In a shaker, add the fresh raspberries, simple syrup and lemon juice. Muddle together. Add ice and vodka. Shake well. Strain into a martini glass and enjoy!
0 Comments
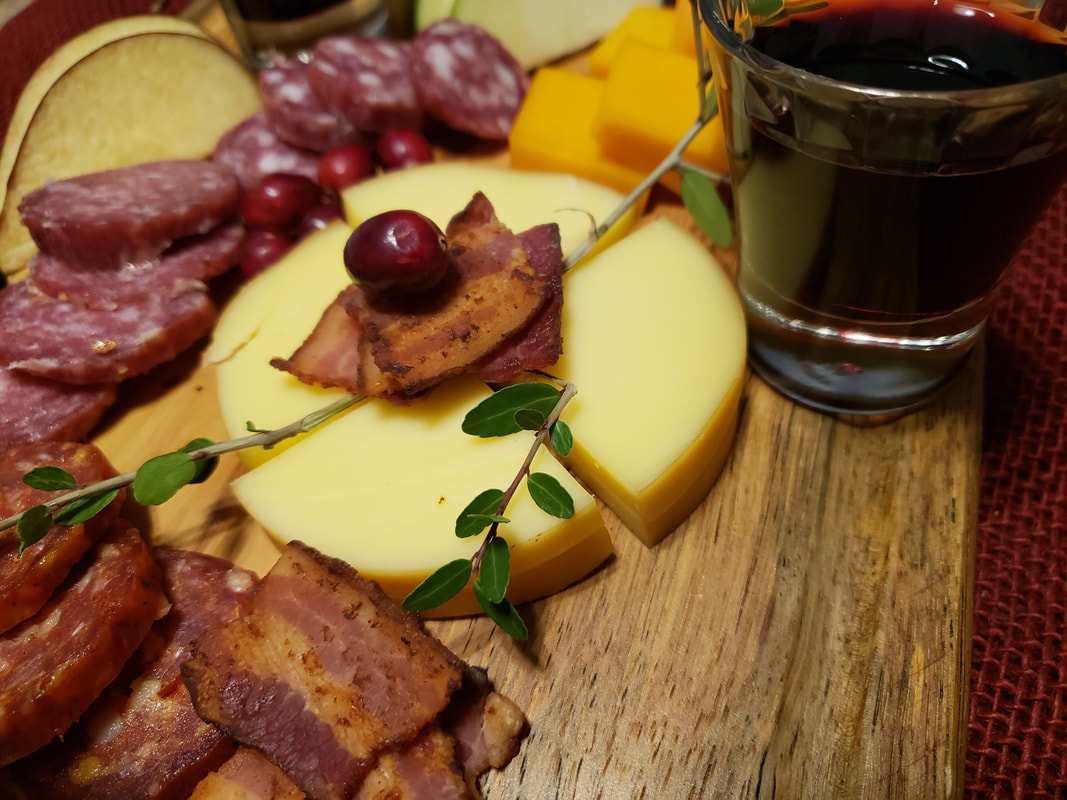
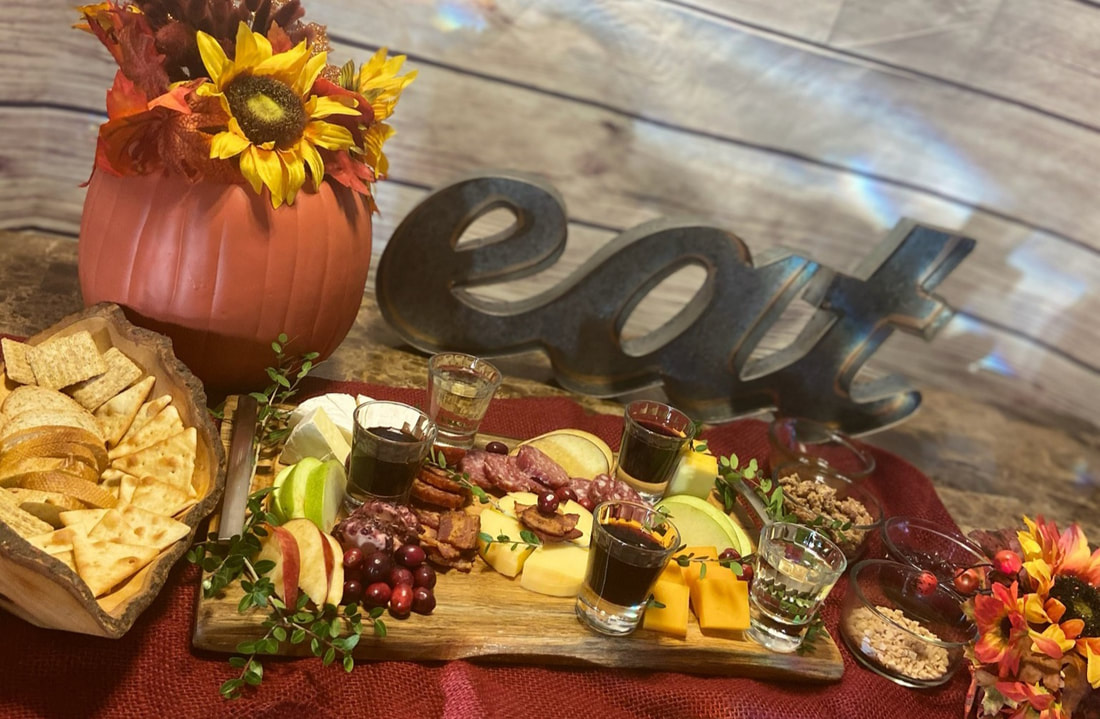 2020 has been full of ups and downs for all of us. The holidays may look different this year, but if you are able to gather with your family and friends, try this fall charcuterie board! Charcuterie boards are a great start to any event. They are a welcoming note for guests to enjoy while they settle in and get comfortable and will tide them over until the main course. Below is our take on a fall board to serve as inspiration for this years Thanksgiving gathering. This board can be tweaked and assembled according to the resources you have available. Throughout this post we will add notes on how to dress up or down your board. 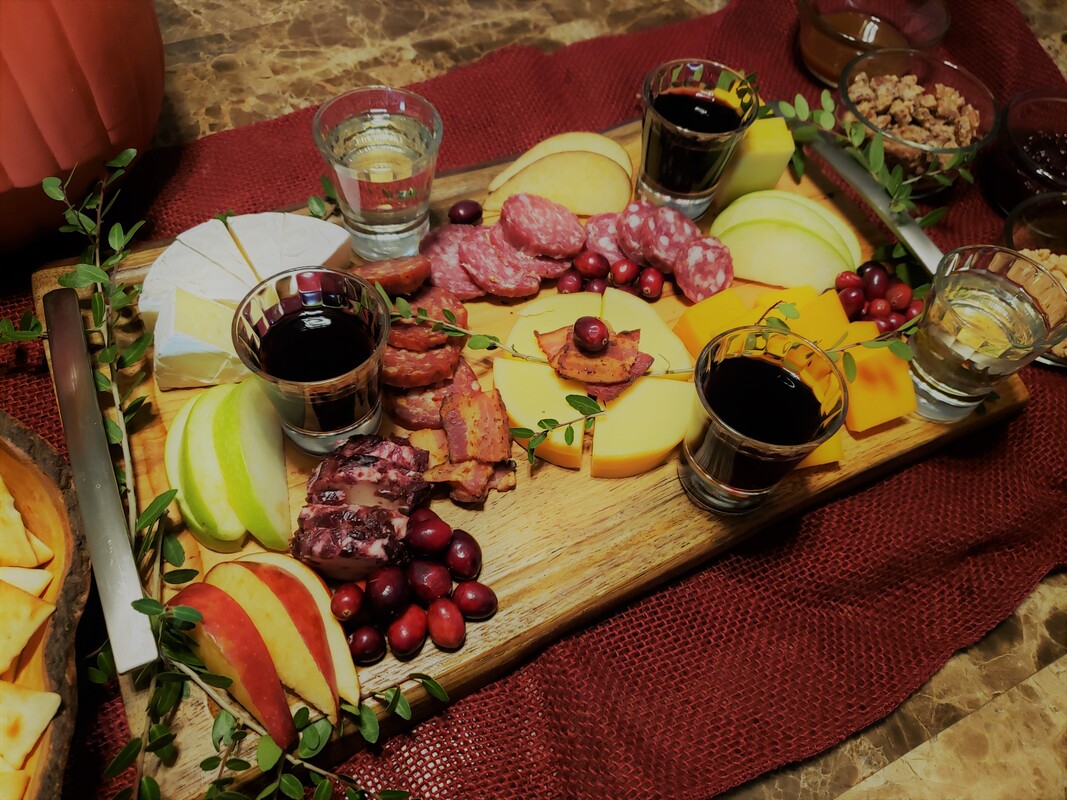 Let's get down to business, here is everything we included in our board: Cheeses:
There were a few items we played with that are not traditionally found on other charcuterie boards you may come across, but they work really well for a harvest board. For this board we added:
 Making homemade pumpkin spice candied nuts is very simple and can be baked in the oven while you are assembling the rest of your board. We used this simple recipe:
The items that will really wow your guests and set your board apart from the others are the hard chorizo and cranberry cinnamon goat cheese (we found both at our local Publix). If you can't find these exact items, do not fret! You can easily substitute any meat with a little kick and a goat cheese with sweet warm flavors. Everyone knows that wine and cheese are a perfect pair. Let your guests sample different wine and cheese combinations by setting out shot glasses of reds and whites. This allows your guests to experience different pairings easily and without having to commit to a single glass. 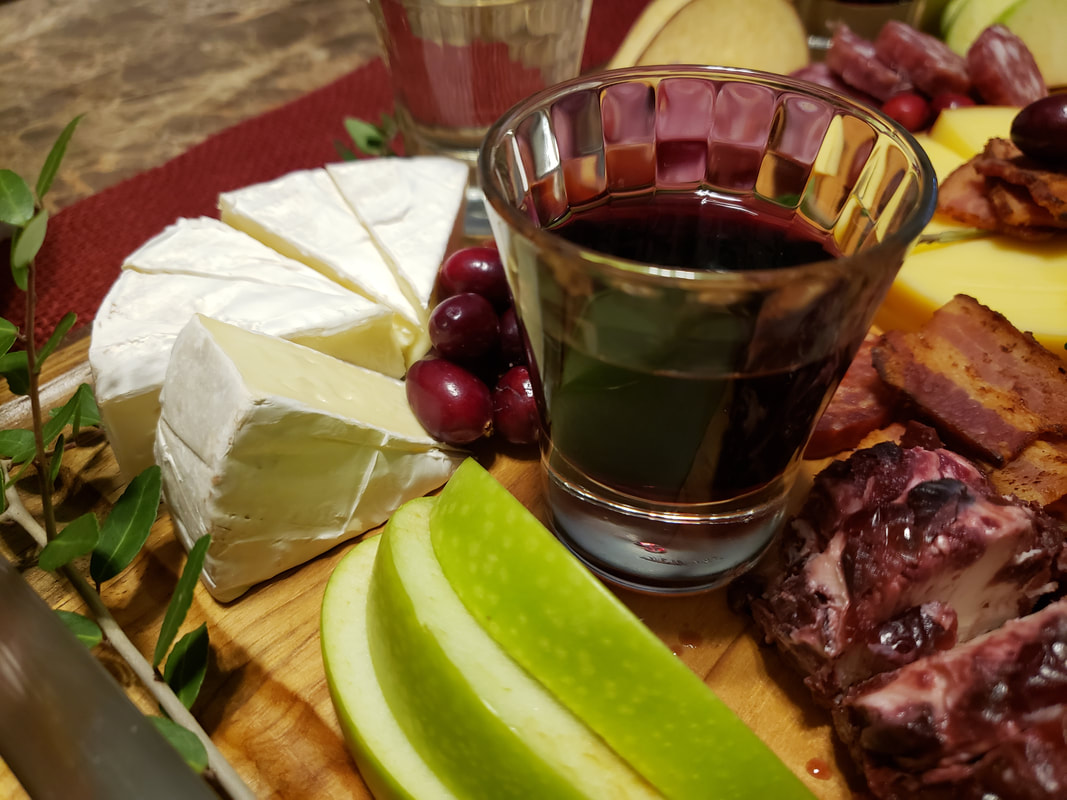 For this board, we skipped the traditional store bought herb garnishes for greenery forged from our own yard. You can, of course, still opt for the traditional rosemary and sage stalks if that is the look you prefer. But if you're up for the adventure (and for cutting costs!), search around your yard or neighborhood (ask permission before snipping your neighbor's greens) and we bet you can find a substitute that looks as fabulous as store bought! Just make sure to skip the poison ivy...
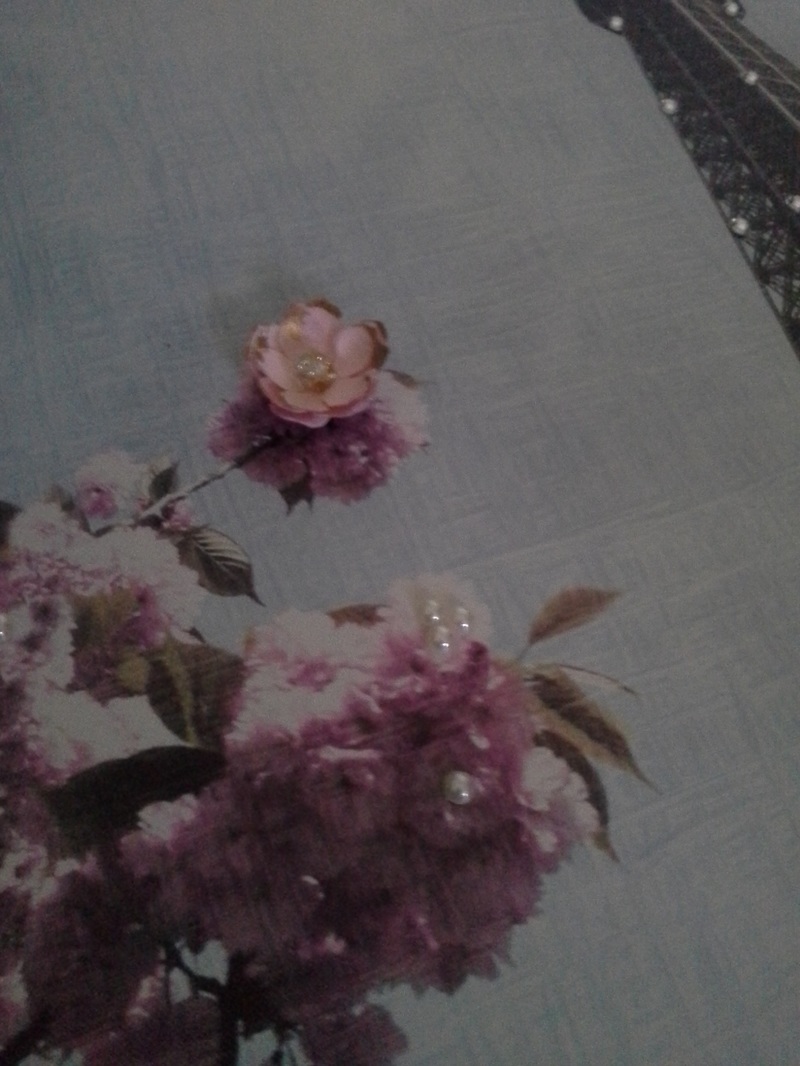
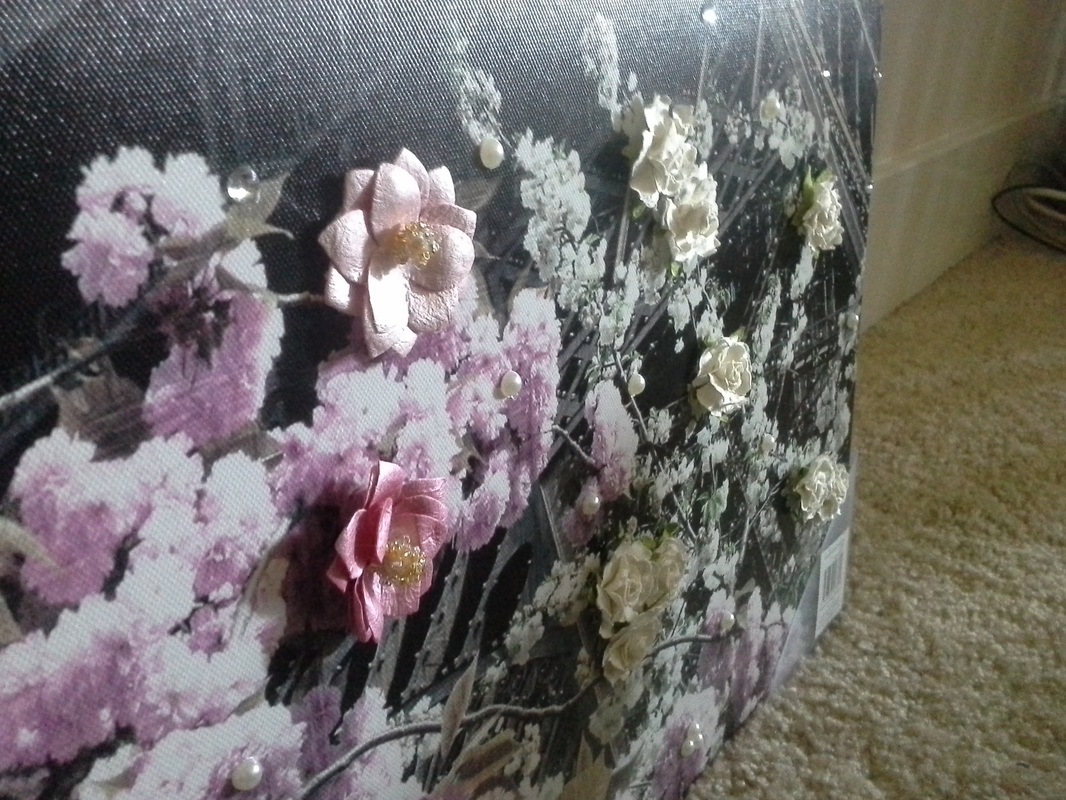
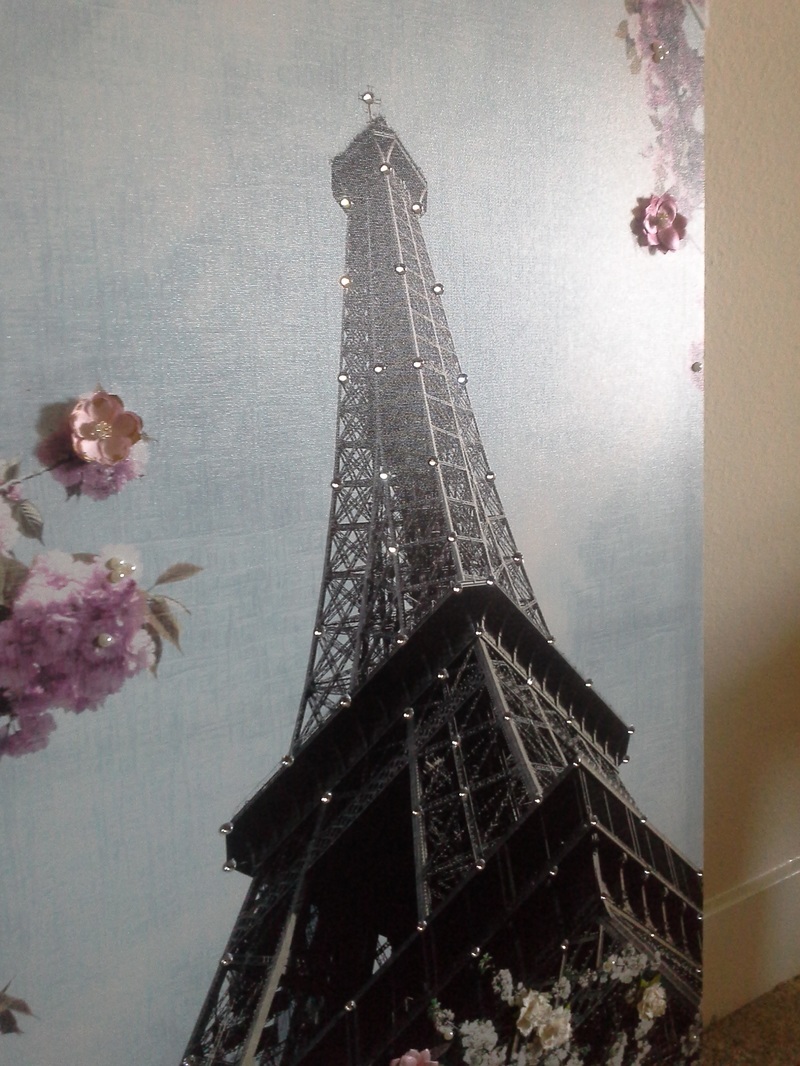
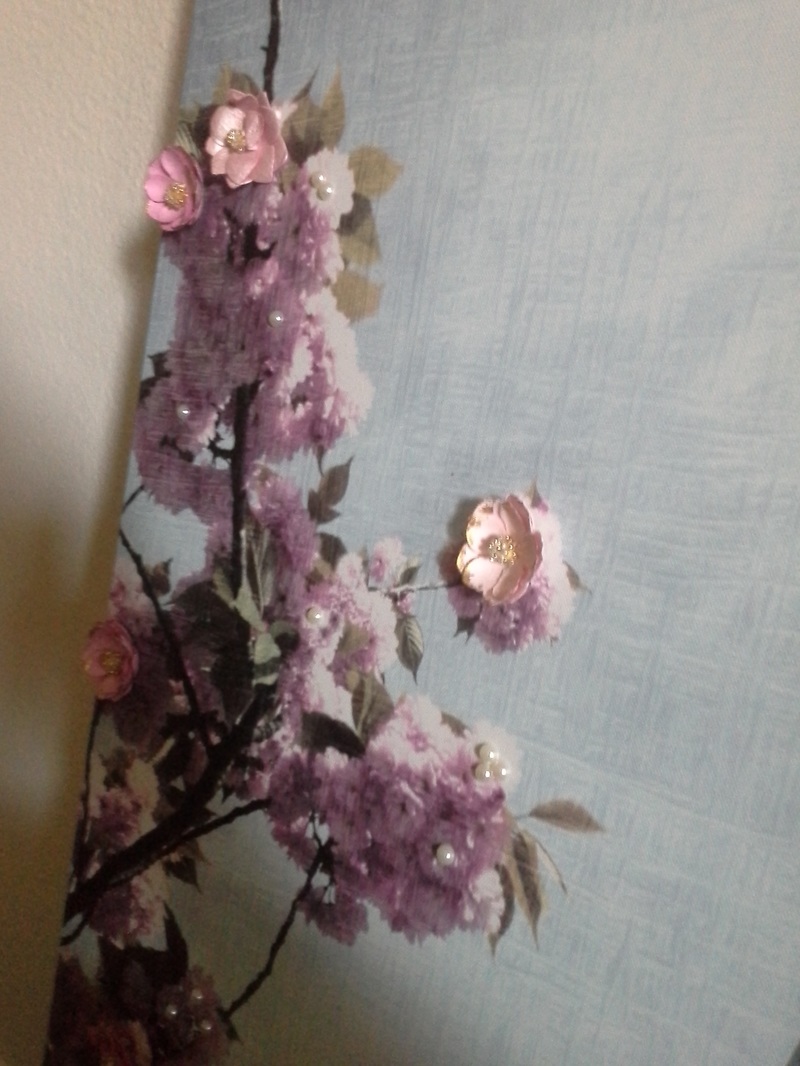
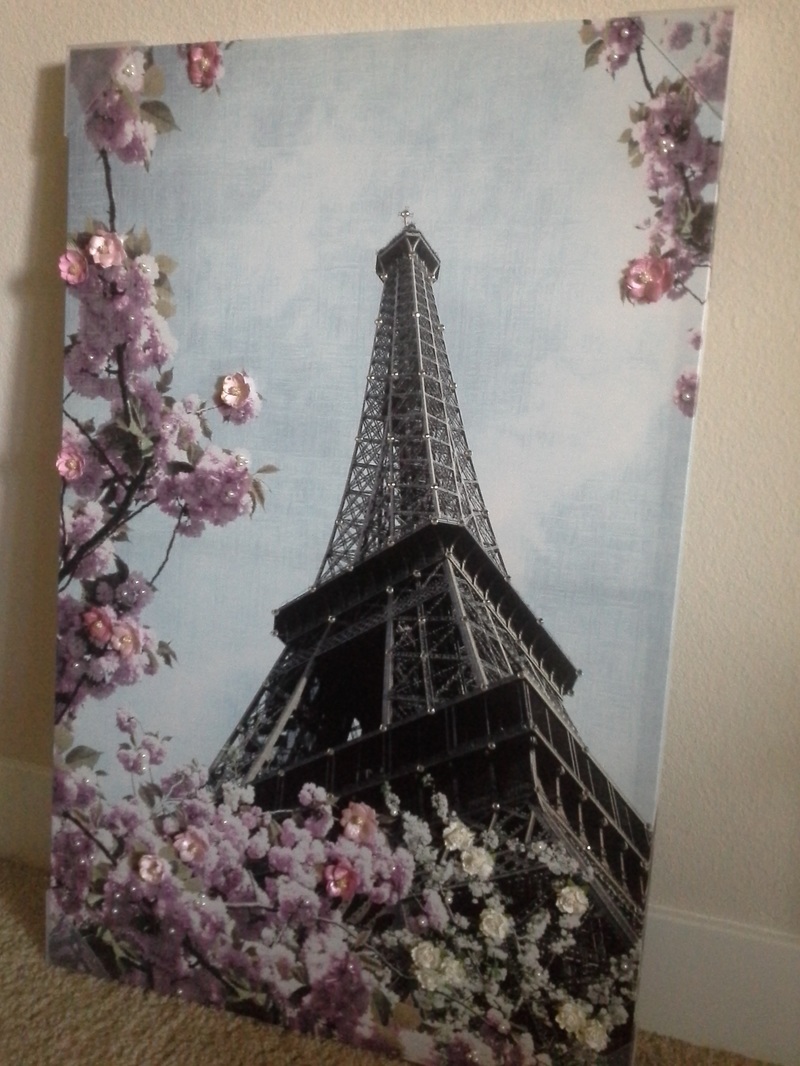
We hope that this post will serve as some inspiration and that you have fun hosting your next event, whenever it may be. 2020 has certainly been challenging for all of us. If you are able to have the opportunity to be with loved ones, please enjoy and let us know how your board turns out in the comments. We hope you have a safe and happy holiday season! 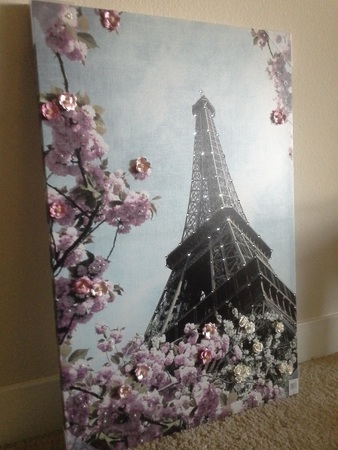 So my sister recently moved in to her new place and has been working to get her guest room put together and decorated. Well of course big sis wanted to help! She decided to go with a Parisian theme and wanted to do it on a budget, like most folks out there. We hit the Pinterest boards for ideas and found a few we liked. With some inspiration in mind, we strolled the aisles of Michaels. With Paris on our radar we came across a pre-made Eifel Tower canvas. One of our ideas was to create an Eifel Tower image on a blank canvas with paint and flowers but when we saw this canvas we thought, hey, this will cut down on some of the work we have ahead of us. And the best part? It was 80% off! 80!!! Originally $69.99, we snagged the canvas for $14! But something crafty in us couldn't fight the urge to do it ourselves.
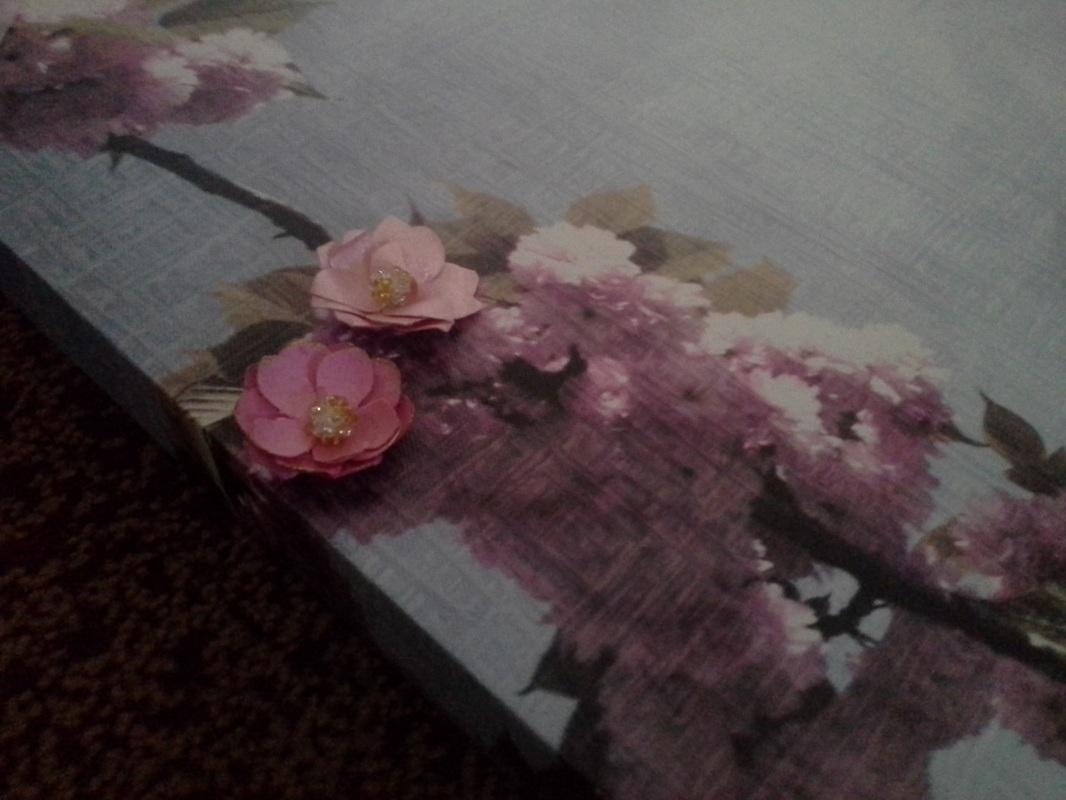
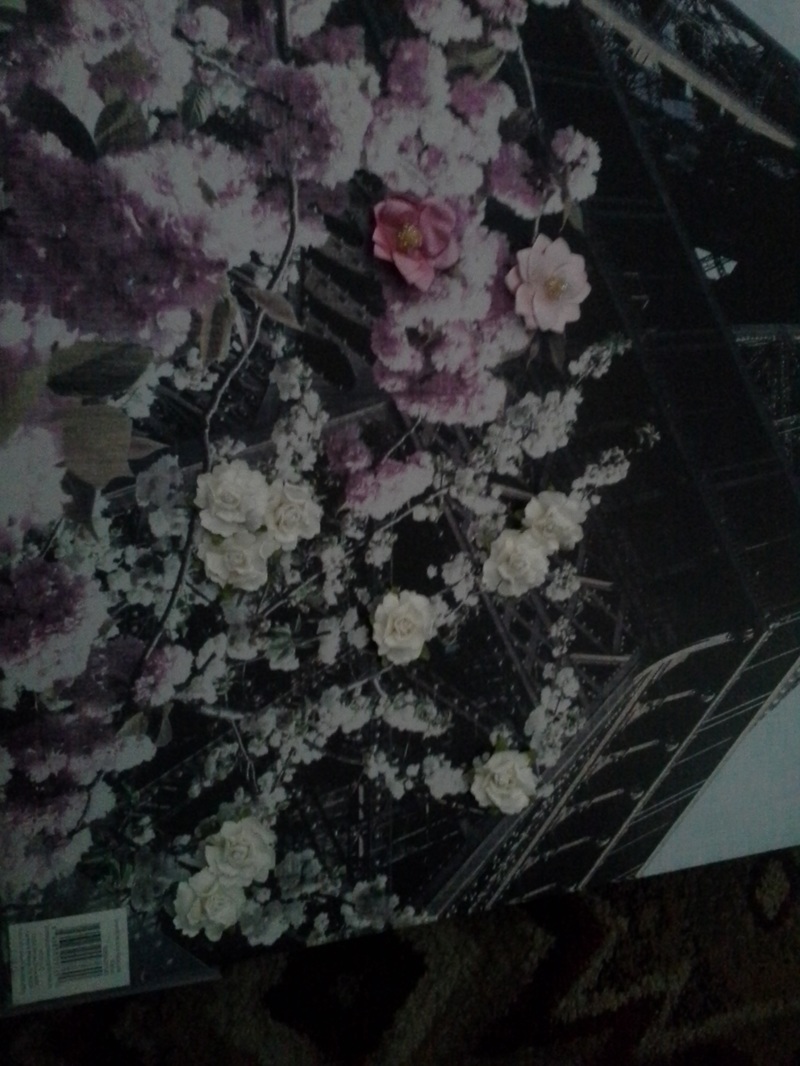
We placed the pearl embellishments in singles and well as groups of twos and threes on the canvas.
We decided to use the rhinestones to embellish the Eifel Tower to create a metallic illusion. 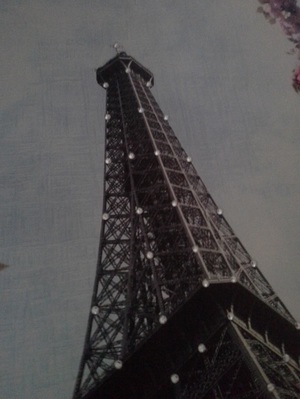 The pearls and rhinestones had an adhesive backing but we glued down the ones that weren't quite so sticky. We took a final look and filled in any areas that looked bare and then we were done! This project was Paris themed but the technique can be applied to any type of picture you want. The total cost of this project was about $25! Simple yet one of a kind. |